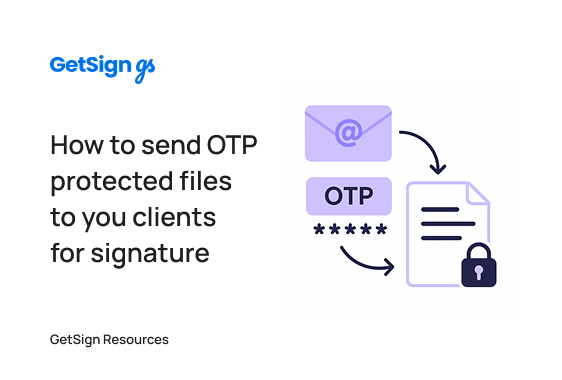
When you need an added layer of security for your most sensitive agreements, OTP authentication with GetSign on monday.com offers peace of mind. This guide walks you through how to secure your document with a one-time password (OTP), ensuring only the intended recipient can view and sign it.
What is OTP authentication in GetSign?
OTP (One Time Password) adds a secure identity check to your eSignature process. When enabled, recipients must enter a time-limited code sent to their email before they can access and sign the document.
This feature is ideal for high-stakes transactions, personal data compliance, or any use case where document access must be tightly controlled.
Why OTP authentication matters
- Double-layer security: Even if the document link is shared, the OTP ensures only the intended recipient can access it
- Authentication assurance: The signer must verify their identity via email
- Regulatory readiness: Adds an extra compliance layer for HIPAA, GDPR, or financial audits
- Confidence in confidentiality: Sensitive data stays protected with minimal friction
Use cases for OTP-authenticated eSignatures
1. High-value contracts
Secure mergers, acquisitions, or large deals with added authentication.
2. Healthcare & insurance forms
Protect patient data and meet compliance standards like HIPAA.
3. Financial or legal agreements
Use for loan contracts, disclosure forms, and executive-level documentation.
4. Internal executive approvals
Ensure only top-level managers can open and sign mission-critical documents.
Step-by-Step: Set Up OTP Protected Document on monday.com using GetSign
Below, we walk you through the step-by-step instructions to create an OTP protected PDF —giving your business confidence and peace of mind.
1. Prepare Your Document for Sending
1. Select Your Board & Item
– Log into monday.com and choose the board containing the document you want to secure.
– Open the relevant item (e.g., a contract or agreement) and switch to the GetSign view.
2. Upload or Create a Template
– If you haven’t already, click “Upload a New Template” to add your PDF, DOCX, or other file formats.
– Use GetSign’s drag-and-drop editor to insert text fields, signature fields, or date fields as needed.
3. Click “Save”
– Once you’ve mapped all required fields, save your changes so the document is ready for the next step.

Why This Matters: Having all fields set up in advance ensures your recipients can fill out and sign the document immediately after unlocking it.
2. Activate OTP in GetSign Settings

1. Access the “Settings” Panel
– Within the GetSign view, look for the “Settings” or “Security” section.
– You should see an option labeled “Enable OTP” or “Activate OTP.”
2. Tick mark on ‘OTP – Secure your documents delivery’
– Turn on the ‘Enforce Passcode’ option to secure your document with a one-time password.
3. Assign Delivery Method
– Confirm that the recipient’s email address is correctly set.
– GetSign will send the OTP passcode to that email, ensuring only they can unlock the file.
Outcome: With OTP enabled, any attempt to open the document will require a unique passcode emailed to the intended signer.

3. Send the Document & OTP Instructions

1. Review Sender Details
– Check your Sender Name and Sender Email in the GetSign settings to ensure a professional, recognizable sender identity.
2. Click “Send”
– Dispatch the document link via email or copy the link to share through another channel.
– Recipients receive an email stating that an OTP-protected document is waiting for them.
3. Automated OTP Email
– Once the recipient attempts to open the document, GetSign automatically emails them a one-time password.
– This passcode is unique and valid only for a single session or a limited time window.
This automated process removes the need for manual passcode distribution, simplifying your workflow.
4. Recipient enters the OTP to Unlock the Document

1. Open the Document Link:
– The recipient clicks the link in their email, prompting a “Enter Your OTP” screen.
2. Check Their Email for the Passcode:
– In a separate email, they’ll find the OTP passcode sent by GetSign.
3. Enter OTP:
– They type or paste the passcode into the provided field, unlocking the PDF for review and signing.
Result: The signer gains exclusive access, ensuring no unauthorized party can view or modify the document.
Benefits of OTP-authenticated eSignatures
- Stronger access control: Prevents unauthorized views even if links are shared
- Improved recipient confidence: Signers know their identity is being protected
- Reduced liability: Demonstrates due diligence in protecting sensitive data
- Detailed audit trail: All OTP entries are tracked and time-stamped
FAQs: OTP authentication in GetSign
Can I reuse an OTP for multiple signers?
No. OTPs are unique to the session and recipient.
What if the recipient doesn’t receive the OTP?
They can request it again. Make sure their email is correct and not in spam.
Can I set how long the OTP is valid?
Yes. You can choose the expiration window when setting up the OTP option.
Does this add extra cost?
OTP is included in GetSign’s security features—no additional charge.
Is it mobile-friendly?
Yes. Recipients can receive and enter OTPs on desktop or mobile.
Conclusion
OTP authentication with GetSign adds a critical security layer to your eSignature workflows in monday.com. Whether you’re handling financial agreements, healthcare data, or confidential executive approvals, OTP ensures access control and builds trust in digital processes.