Imagine your team is working on multiple contracts, purchase orders, or agreements in monday.com, and you need to send them for signatures, track approvals, and maintain compliance. Manually handling these processes—emailing documents, chasing signatures, and updating statuses—creates inefficiencies, slows down operations, and increases the risk of missing approvals.
Why this problem matters?
Without a system like GetSign:
- Teams waste hours manually managing document approvals
- Signatures are delayed and hard to track
- Legal compliance is compromised without audit trails
- Project and deal timelines suffer due to outdated workflows
The Solution: Sign, Generate and track documents with GetSign
GetSign is a monday.com-native e-signature app that lets you create, send, sign, and track documents—right from your monday.com boards. No tool-switching, no manual follow-ups. It enables users to send, sign, and track documents without switching tabs. Built for fast-moving teams, GetSign offers automation, audit trails, secure OTP delivery, and support for both template and ad-hoc documents.
Whether you’re approving vendor agreements, onboarding employees, or closing deals, GetSign turns document signing into a seamless, trackable experience.
Core Benefits of GetSign:
- Integrated directly into your monday.com board view
- Supports legally binding e-signatures compliant with global standards
- Enables automated reminders and status updates
- Offers customizable templates and PDF generation from board data
- Provides audit trails to meet compliance and accountability standards
Real-Life Use Cases of GetSign
Project Management
A product manager updates a statement of work and sends it to a stakeholder for approval. With GetSign, the document is sent automatically, and the board status updates in real-time once it’s signed.
Sales & CRM
Sales reps generate custom contracts using board data and send them for signature without leaving their CRM board. Signed agreements are instantly available for the finance team to process.
HR & Onboarding
HR teams send employment agreements, NDAs, or policy acknowledgment forms using predefined templates. Employees sign digitally, and HR is notified when documents are completed.
Legal & Compliance
Legal teams track who signed what, when, and where. Every signature has a detailed audit trail, helping ensure documentation is secure and legally sound.
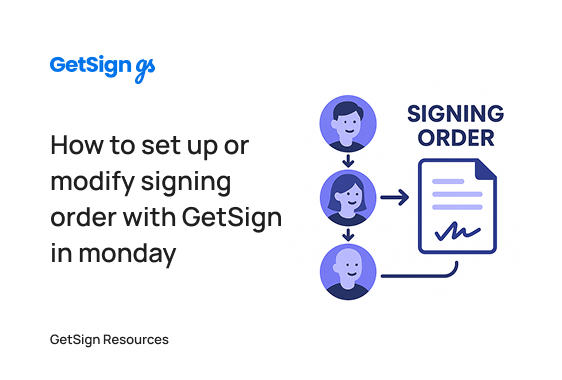
Step by step guide on sending and signing document with GetSign
GetSign is a powerful tool that enables you to easily create, send, sign and track eDigital Signatures using your monday.com boards. Whether you need to get signature on purchase orders, price quotes, contracts or agreements, GetSign has you covered.
Here’s a step-by-step guide on how to install and use GetSign:
Step 1 – Installing GetSign
- Go to the monday.com App marketplace and search for “GetSign”.
- Click on the “Add to your account” button.
- Follow the authorization process to install the app.
- Once installed, navigate to the board where you want to use GetSign.
- Click on any existing item or create a new item.
- Click on the “+” button to add a view and select GetSign.

Step 2 – Create the necessary columns
- Navigate to the board view and click on the “+” button to create new columns for your board. Consider adding columns for “status,” “email,” and “files.”
Reminder:
At the start, default statuses are available. As you move along the different stages of signing, different statuses will be loaded. A full list of statuses will be fully loaded once you complete the signing process.

Step 3 – Uploading a document
- Click on the “Upload File” to upload a new document which you need to sign. GetSign supports Docx or PDF format files.
- Clicking on “Add new template” opens up the Template Gallery. You can view all the documents uploaded from the board.
- Select – You can select a document to start working on the specific upload document.
- Eye icon – To view the document
- Pencil icon – To edit the document in the GetSign editor
- Copy icon – This will duplicate the original document and changes made on the duplicate document will not affect the original one.

Multiple Documents
You have the option to attach multiple documents per item and send them collectively. Each document can be distinct, with customized placeholders.
However, it’s important to note that if you send multiple documents and your client declines even one, the entire set of signed documents will be declined. All documents must be signed to complete the process.
Step 4 – Mapping of board columns
- Go to the item view and select the “GetSign” tab.
- On the “GetSign” tab, you will see a list of columns. You can map each column to the corresponding board column you created in Step 1.
- Once you have mapped all the columns, click the “Save” button to save your changes.

Step 5 – Customizing Outgoing Emails

- Sender Name: Provide the sender’s name.
- Email Address: Enter the sender’s email address.
- Email Subject: Input the subject of the email.
- Message: Include your personalized message to the recipient.
- Logo: Upload your company logo for email branding purposes.
- Email Language: Choose the preferred language.
- OTP: Activate this option to ensure secure document delivery.
Step 6 – Verify your email
Prior to sending your documents, it’s essential to verify your email address to prevent your emails from being flagged as spam.

Next, head to your email inbox and complete the email verification process.

Step 7 – Add signature fields
- To modify the document and allocate signature fields in the GetSign “Item View” tab, click on the “Settings” button.
- Utilize the “pencil” icon for document editing. Drag the “Signature” field to position a signature
- Select the email column created in Step 2 to assign it to the signature field. If you skip this step, you won’t be able to send your document.
Reminder: Make sure that the email column in your board contains specified email addresses and is not empty; otherwise, the email will not be sent.

To access multiple documents, you can switch between them by clicking the dropdown menu in the top navigation.
Step 8 – Signing and sending document
- You can click on “Sign” if you want to sign the document if it’s necessary.
- Alternatively, you can send the document to the receiver.
Note that the receiver email is defined in the email column of the board.

- Preview: Enables you to view the document.
- Copy Link: Permits you to share a link with the signer for direct document signing.
- Download: Grants you the ability to download the completed document.
- Send: Enables you to dispatch the document to the recipient.

The recipient will receive a “Review & Sign” email on the given email ID, which needs to signed.
Document Signing

After clicking “Review & Sign”, you need to add your signature in the defined placeholder, and click “add” and “save”.
Signed Document:

Once the receiver views and signs the document, the board and item view status will be updated in real time.

Once the document is signed, it would be ready for download from the email or from the monday.com board itself.
Start Sending Smart, Trackable Signatures Today
If you’re still emailing documents and chasing signatures manually, it’s time to level up. With GetSign, your e-signature process is automated, secure, and seamlessly integrated with your team’s workflow inside monday.com.
Install GetSign and automate your signing process today.
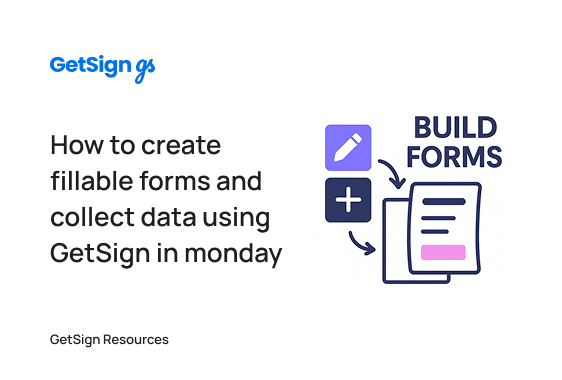
How to generate documents from monday.com board data using GetSign?
With GetSign integrated into monday.com, you can turn your board data into polished, brand-consistent documents—automatically. Whether it’s a contract, invoice, status report, or onboarding letter, GetSign allows you to:
- Upload a DOCX (recommended) or PDF template once and reuse it across items
- Automatically fill it with values from any board column—text, dates, numbers, totals
- Generate and save documents as soon as an item reaches a certain status
- Output files as DOCX or PDF and store them directly in a file column
- Preview, customize, and re-edit templates without leaving the board
This transforms monday.com from just a place to track tasks and data into a complete document automation system that supports real-world business outputs.
Use status trigger to generate documents
GetSign connects to your monday.com item view, where you can upload DOCX templates, insert dynamic fields linked to board columns, and define automation triggers like a status change. Once set, a document is generated automatically when an item hits the trigger condition and is saved back into the item for download, printing, or sharing.
How generating document helps multiple teams
Teams across industries can benefit from automated document generation in monday.com:
- Sales & Account Management: Automatically create branded invoices or proposals when a deal is marked “Won”. Pull in client name, itemized pricing, tax, totals, and due dates from board fields.
- HR & Onboarding: Generate custom offer letters or welcome kits with personalized fields like job title, start date, salary, and manager name, pulled from your recruitment or onboarding board.
- Finance & Billing: Build monthly billing summaries for clients by summing up logged hours, line items, or services from sub-items and generating invoices at the end of each cycle.
- Project Management: Create stakeholder-facing project summaries or update reports with milestones, tasks completed, and notes—triggered automatically when a project status changes to “Ready for Review”.
- Legal & Admin: Auto-fill agreement templates with client details, deliverable descriptions, and contract terms for quick generation and review—all version-controlled in your monday.com board.
Step-by-Step Setup Guide to generate documents using GetSign:
1. Install the GetSign item view
- Go to the monday.com marketplace and install GetSign.
- Add it to the item view on your board where document generation will be configured.
2. Upload your template
- Open the Templates and Documents section in the GetSign settings.
- Upload a DOCX file with placeholders for the data you want to populate (e.g., client name, date, line items, total).

- This could be an invoice, offer letter, project brief, or custom agreement.
3. Set up document generation rules
- Go to the GetSign Generate section.
- Select a Status Column that will act as the automation trigger (e.g., “Document Status”).
- Choose the value that should trigger generation (e.g., “Ready”).
- Pick the File Column where the generated file should be saved.
- Choose your desired output format: DOCX or PDF.

4. Map fields and customize template
- Click Edit Template to open the GetSign editor.
- Insert dynamic fields from your board—such as:
- Item Name (e.g., Client Name)
- Date columns (e.g., Created Date, Deadline)
- Text or dropdown fields (e.g., Job Title, Contract Terms)
- Price and number fields (e.g., Cost, Hours Logged, Subtotals)
- Item Name (e.g., Client Name)

- Use the Add sub-items option to insert sub-items inside your board item. You can also filter those sub items using multiple AND/OR conditions.

- Select a currency format and set it to appear before or after values.
5. Preview and save
- Use the built-in Preview to test how your document will look with live board data.
- Adjust formatting, spacing, or field placement as needed.
- Click Save Template to finalize the setup.
6. Generate a document automatically
- Change the item’s status to the trigger value (e.g., “Ready”).
- GetSign will generate the document using the current values in your board.
- The finished file will appear in the selected file column within seconds.

Hence, with GetSign for monday.com, you don’t just store data—you put it to work. Automate the creation of documents like like invoices, contracts, letters, and reports using your live board values, with just one status change.