In many organizations, document approval isn’t as simple as getting one signature. Complex workflows often require multiple stakeholders to sign in a specific order—for instance, a purchase request that must first be approved by a requester, then reviewed by a technical lead, and finally signed off by the finance department. Without automation, coordinating this signing sequence over email or shared drives is inefficient and error-prone.
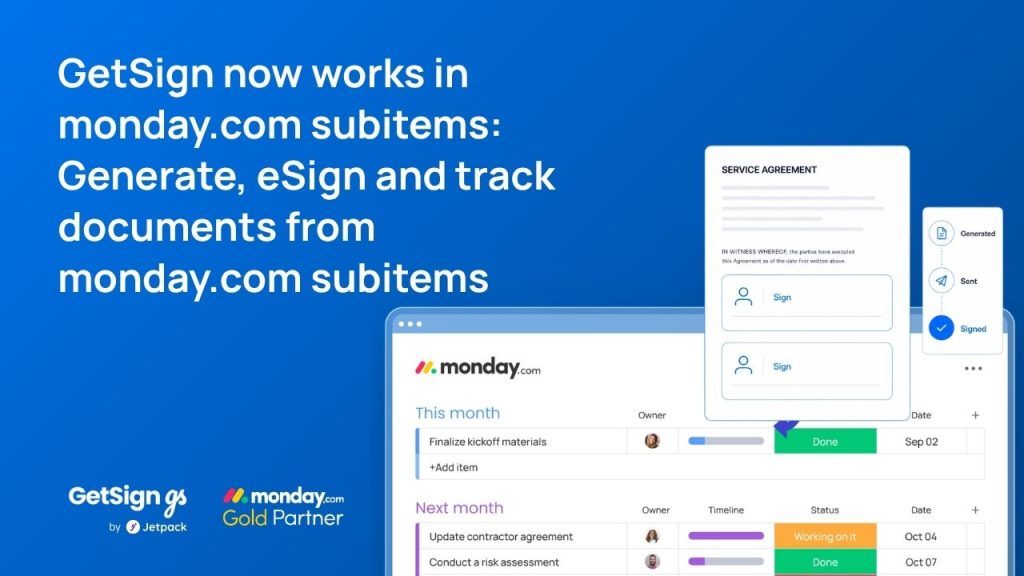
That’s where GetSign for monday.com comes in. With the signing order feature, teams can automate multi-step approvals directly within their monday.com boards. This article will guide you through setting up signing order logic for your documents using GetSign.
Recent Update: How to generate multi-signer links on monday.com with GetSign. The tutorial video will help you setup to generate multi signer links on monday.com.
Understanding the use case: Why signing order matters
In scenarios where documents must follow a specific approval flow, it’s not enough to just send the same document to multiple people. You need to ensure each signer receives the document only after the previous signer has completed their part. This is common in:
- Purchase approval processes (Requester → Tech Lead → Finance)
- Legal contract workflows (Legal Review → Manager → Vendor)
- Hiring or onboarding documents (Recruiter → Team Lead → HR)
GetSign helps you configure and enforce this step-by-step signing process, preventing mistakes and delays in your document workflows.
Step by step guide to configure signing field
Step 1: Upload your document template to GetSign
To begin, you need to upload your document template in the GetSign item view in monday.com:
- Open the item view on your monday.com board.
- Launch the GetSign interface from the item view.
- Click Upload Template and select your document file.

- The GetSign Editor will open, allowing you to insert signature fields for each signer.(Note: If your browser has blocked the pop-ups, go to the template gallery after the template is uploaded and then click on edit option to edit the template.)

You can assign each signature field to a different signer (e.g., Requester, Technical Lead, Finance Manager).
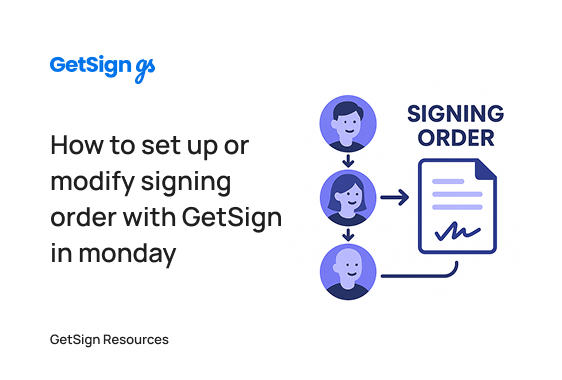
Step 2: Configure the signing order for multiple signers
After adding signature fields, you can enforce the order in which signers receive the document:
- Click on any signature field in the GetSign Editor.
- Enable the “Signing Order Required” option.
- Rearrange the signers using the drag-and-drop interface.
- Place the first signer (e.g., Requester) at the top.
- Add the second signer (e.g., Technical Lead) below.
- Add the final signer (e.g., Finance Manager) at the bottom.
- Place the first signer (e.g., Requester) at the top.

This setup ensures the document moves sequentially through each person only after the previous one has signed.
- Click Save and close the editor.
Step 3: Send the document using status triggers or manual send
With the signing order configured, you’re ready to send the document:
- Configure the status column in the GetSign Signature section to act as a trigger.
- Set up the email delivery settings, including subject, logo, and recipients.
- Use the Share > Send button or simply update the status column to trigger sending.

The document will be sent first to the designated first signer, and then automatically routed to the second and third signers in the order you’ve defined. Once everyone has signed, the signed document will:
- Be stored in the specified file column on your board
- Be automatically emailed to all participants (if you’ve enabled that option in the GetSign Send section)
Signatures Without the Chasing
Auto-remind signers and track status on monday.com
Automate reminders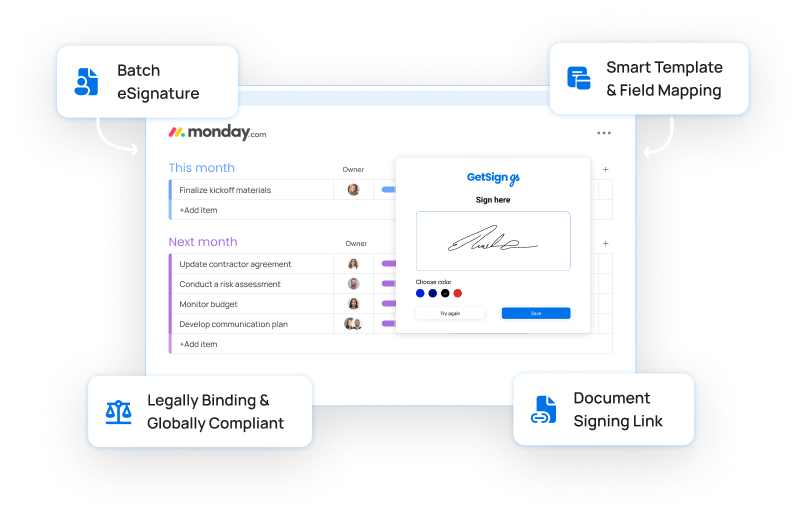
Updating the signing flow: Adding or removing a signer
If the approval process changes and you need to add a new signer (e.g., a CEO), you can easily make updates:
- Click Edit Template to modify the original document.

- Add a new signature field and assign it to the new email or person.

- Save and close the template.
- Return to the item view and reconfigure the signing order as needed.

Note: Every time you update the template, you must reconfigure the signing order.
Benefits of using signing order in monday.com with GetSign
- Automated document routing without manual follow-ups
- Error-free signature collection in predefined order
- Improved compliance with documented signing history
- Seamless integration with monday.com boards and status automation
This feature is especially useful for sales teams, HR departments, procurement, and legal teams who require strict control over signing sequences.
With GetSign’s signing order feature, your document approval processes in monday.com become faster, smarter, and far more reliable. Whether you’re handling purchase requests, internal approvals, or vendor contracts, you can now streamline your multi-signer flows directly from your board—no extra tools or manual chasing required.